The Design Console
The easiest way for a first time user to get started is to use the coServ desgin console. The design console is a web application boundled in the coServ package. It can help developers to get familiar with the core concepts of coServ. Below is how to start the design console:
- Download and install coServ: npm install -g coServ
- Start the coServ server: node coServ
- Point your browser to: http://localhost:8080
Let' have a quick tour to see how the design console work.
Creating A Website
With the design console up and running, you can use the tool to create a website.
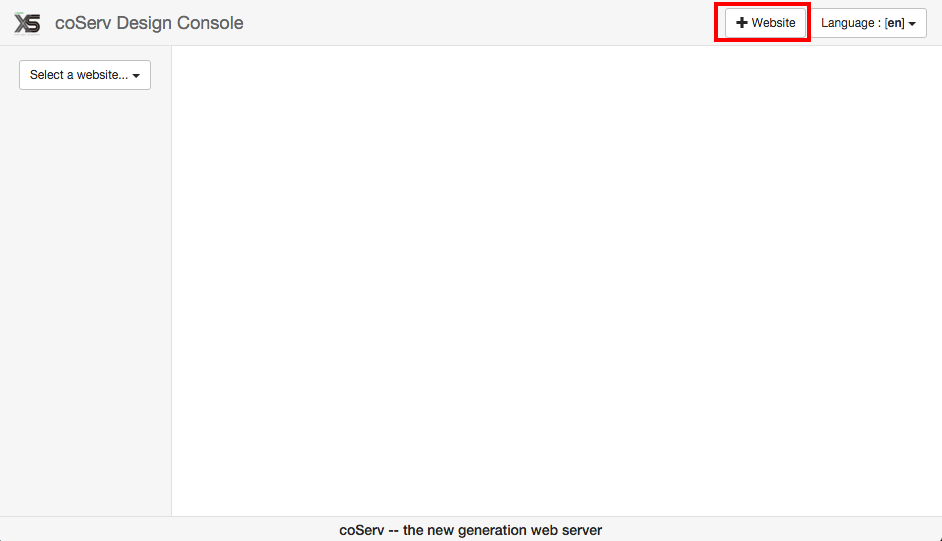
As shown above, you can click on the [+ Website] button on the upper right corner to start creating a new website. Once you've done that, a dialog will show up as below:
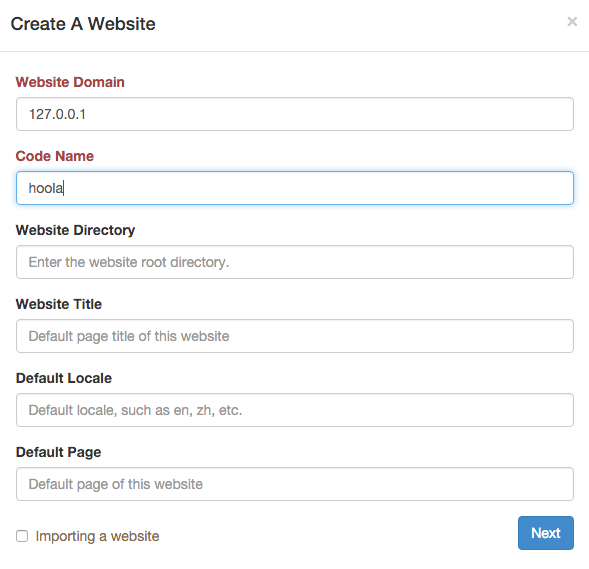
The "website domain" and "code name" inputs are required, and all the other fields are optional. For the "Website Domain" field, you can now enter "127.0.0.1". For the "Code Name" field, enter any name (English letters only, no space) you'd like as the short name of your website. Don't worry about the other fields for the moment. Once you've done that, click the "Next" button.
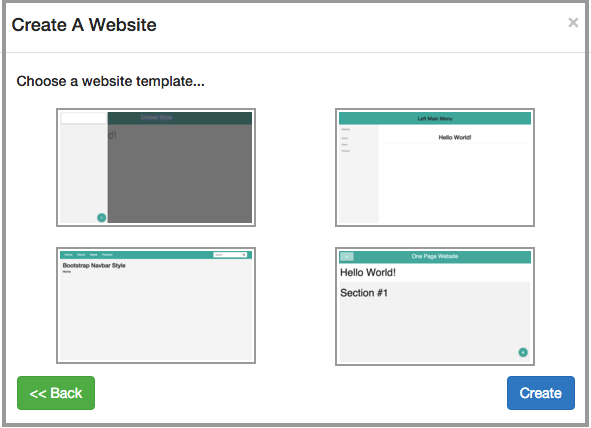
Now you're given a chance to choose a template for your website from a collection of four very simple templates. You can choose a template by clicking on its preview image and hit the "create" button to create the website. Once you've done that, the website will be created in a split second and you can see how it looks like by pointing your browser to http://127.0.0.1:8080
When you hit the "create" button to create a website, the design console will also reload the design page. Now you can edit your newly created website by choosing it from the pull down menu on the left:
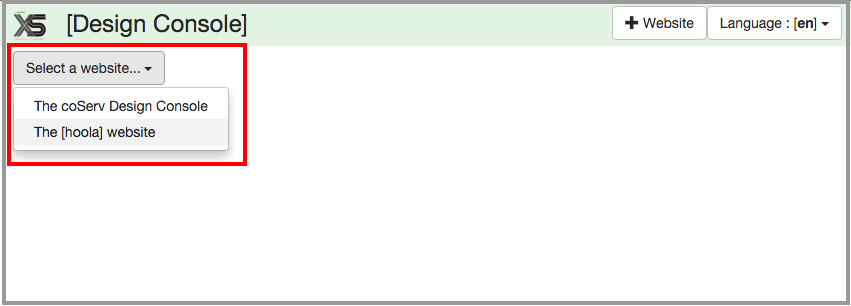
As you'd notice, the "coServ Design Console" is also in the website list. However, you may not want to flirt with it at the moment. Choose the website you've just created and an accordion menu will show up:
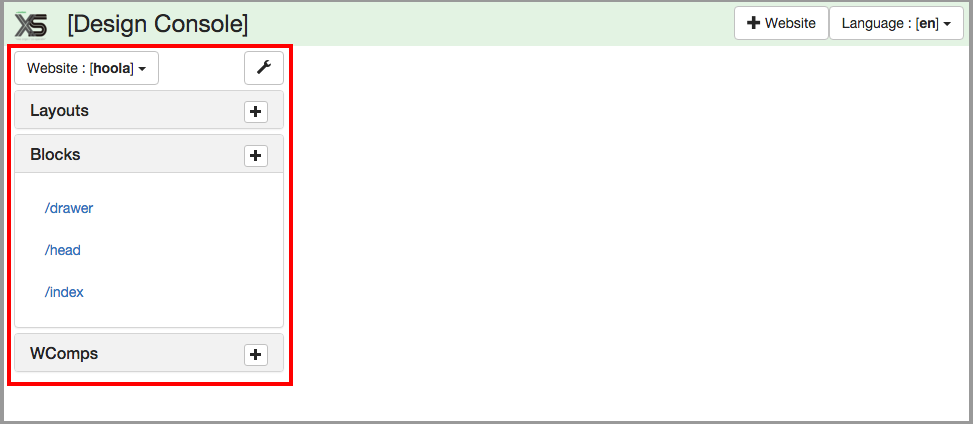
Layouts, Blocks and WComps
As shown in the above image, the main structure of a website is detailed in the accordion menu. Basically, there are three building elements of a website: layouts, blocks and wcomps.
Layouts
Layouts decide how top level blocks of a page are placed out. When a website is created, a "default" page layout will be created automatically. To see what's in the default layout you can click on the "Layouts" section and choose the default layout. Once you've done that, the three inner files making up a page layout will be accessible to you as shown below:
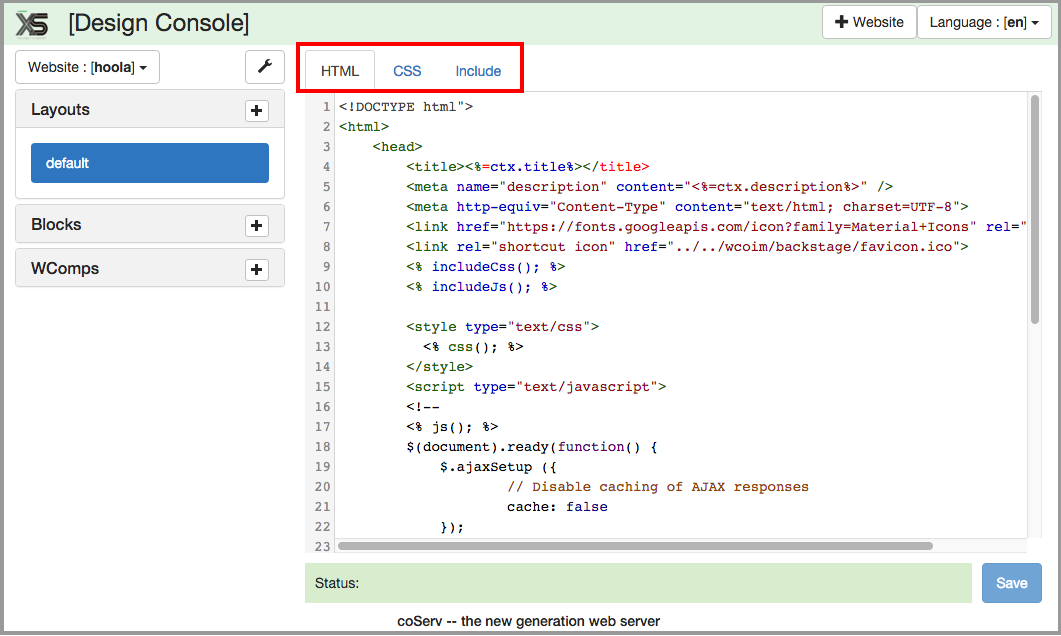
As highlighted inside the red box, those three tabs represents HTML, CSS and include files of a page layout. You can make any changes in the editor and click on the "Save" button to make the changes permanent (you may not want to do so yet). The CSS file specifies CSS decorations at the page level (versus the block level). The HTML file is actually a template than just a plain HTML file. We'll explain more about the HTML template of a page layout in the next chapter. The "include" file specifies any CSS or Javascript files to be included in a page.
Blocks
In the accordion menu, there is another section for blocks. If you click on that "blocks" section, all blocks of the website will be listed. Again, you can click any block and its inner files will be accessible to you.

There are seven tabs for a block. The HTML, CSS and language files will make up the "view" part of a block (we're talking about the MVC paradigm). The JS file is the controller. The "Model" tab contains the node.js module which will serve as the data model of a block. The "config" tab can be used to setup additional info of a block. Finally, the "preview" tab can be used to preview what a block would look like.
WComps
The wcomps section allows you to create, update and delete wcomps. The way the wcomps section works is similar to the "layouts" or "blocks" sections. We'll explain more about wcomps is later in this guide.